Here are some common questions about the mystery feature in MS Word called Track Canges.
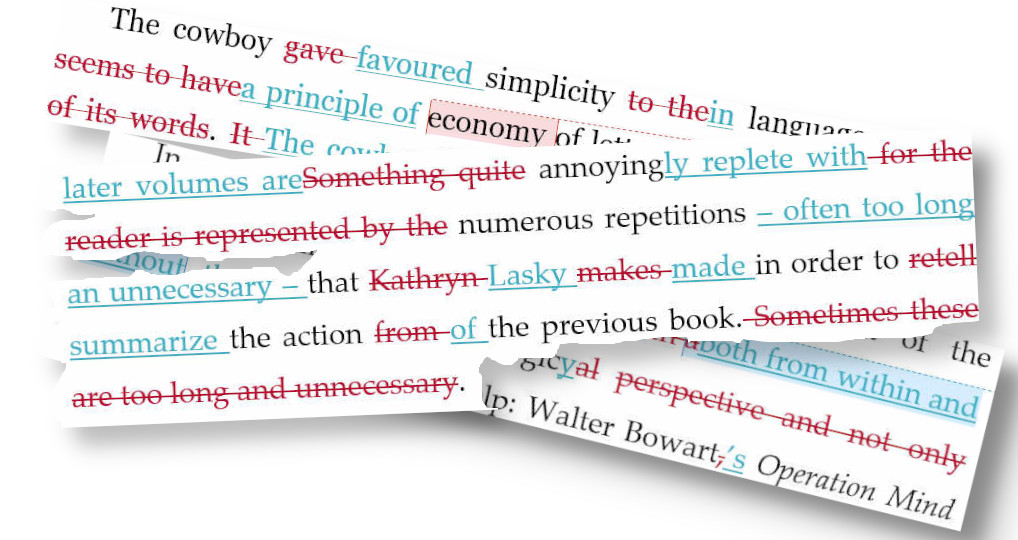
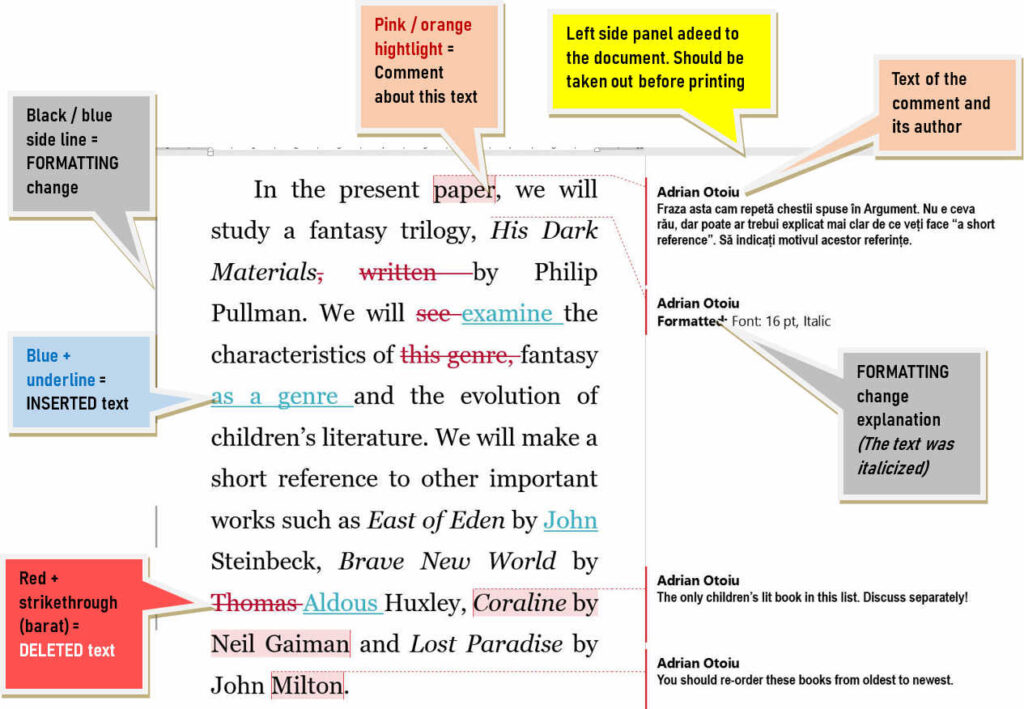
This means your supervisor has read your text using Track Changes to point out the changes he made to your text.
Track Changes. uses colors to indicate the type of changes your supervisor made yo your text. Here’s the meaning of the colours:
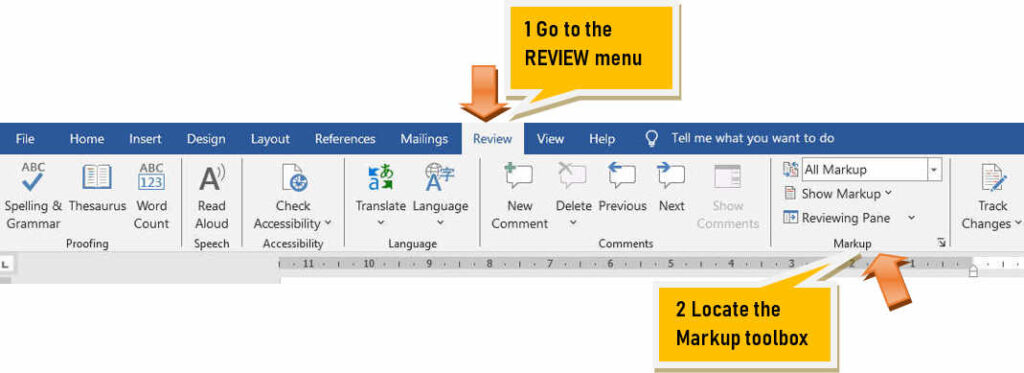
Yes. All you have to do is to go to the Markup toolbox:
… locate the drop-down list originally set to All markup, select Original…
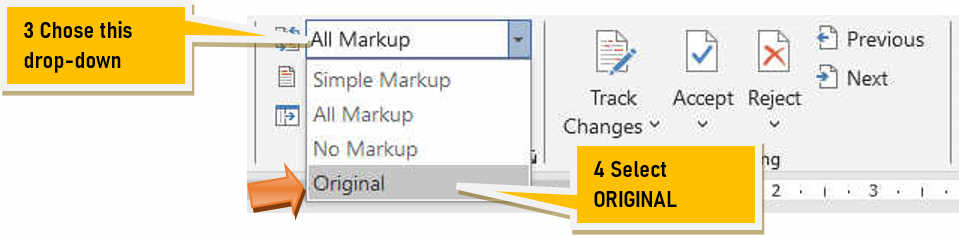
…and you will see your original text, as it was before submitting it:

Yes. You go to the Markup toolbox…
… select No Markup from the drop down list…
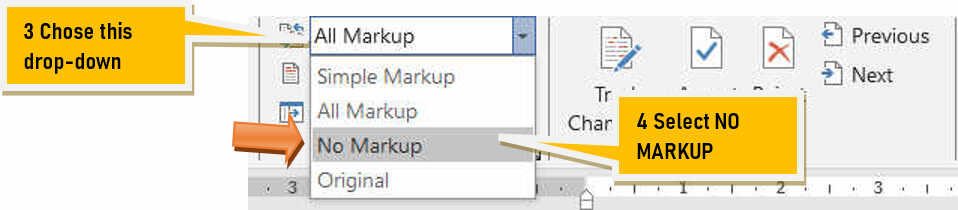
… and here is the text as suggested by your supervisor, clean, no marks:

Go to the very beginning of your document (Ctrl-PgUp is better than scrol scroll scroll!)
In the Review menu, go to the Markup toolbox group. Make sure All Markup is selected.
Then locate the Tracking toolbox:
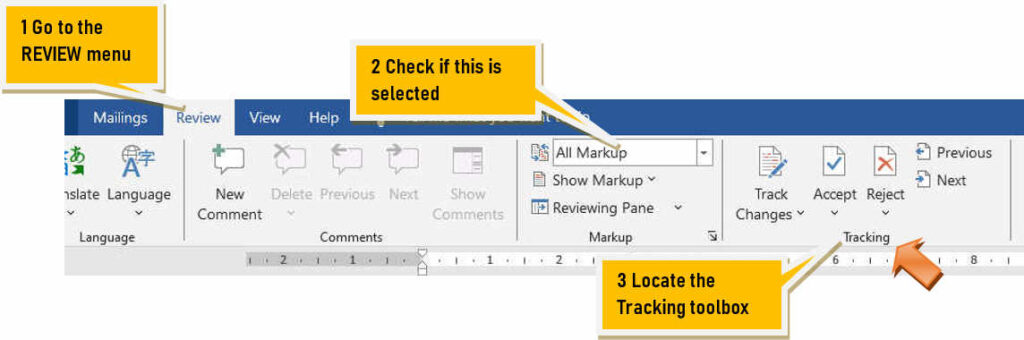
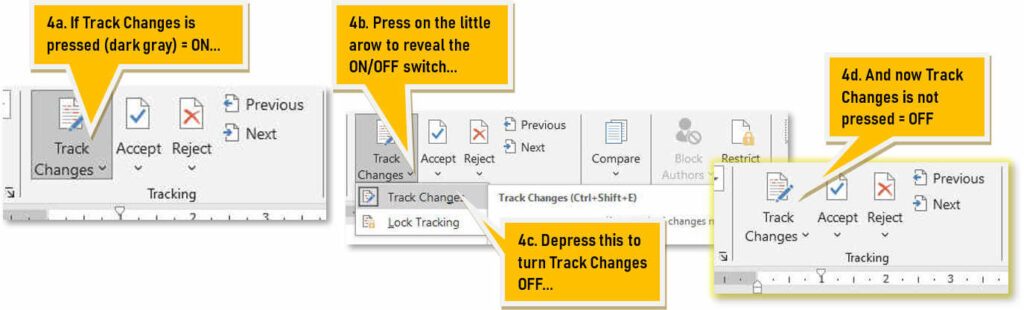
Check if Track Changes button is pressed (dark gray), which means it’s ON. Turn it OFF!
Now click on Next to locate the first change. Approve change:
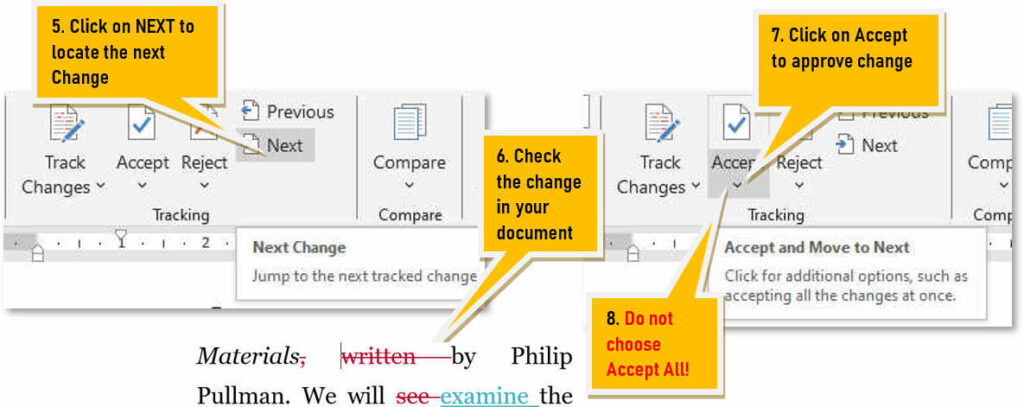
Repeat the Steps 5 to 7 of operation until there are no more changes in the document.
Go to the very beginning of your document (Ctrl-PgUp is better than scrol scroll scroll!)
In the Review menu, go to the Markup toolbox group. Make sure All Markup is selected.
Then locate the Tracking toolbox:
Check if Track Changes button is pressed (dark gray), which means it’s ON. Turn it OFF!
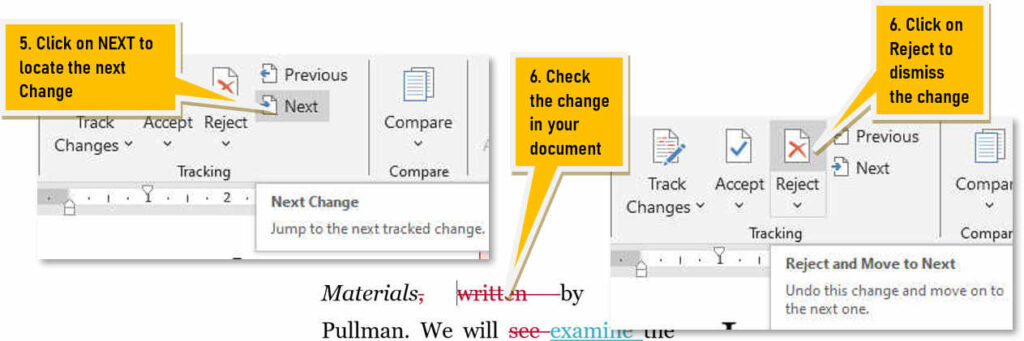
Press the Next button to locate the next change. Examine the highlighted change in your document. If you disagree with the change click on Reject.
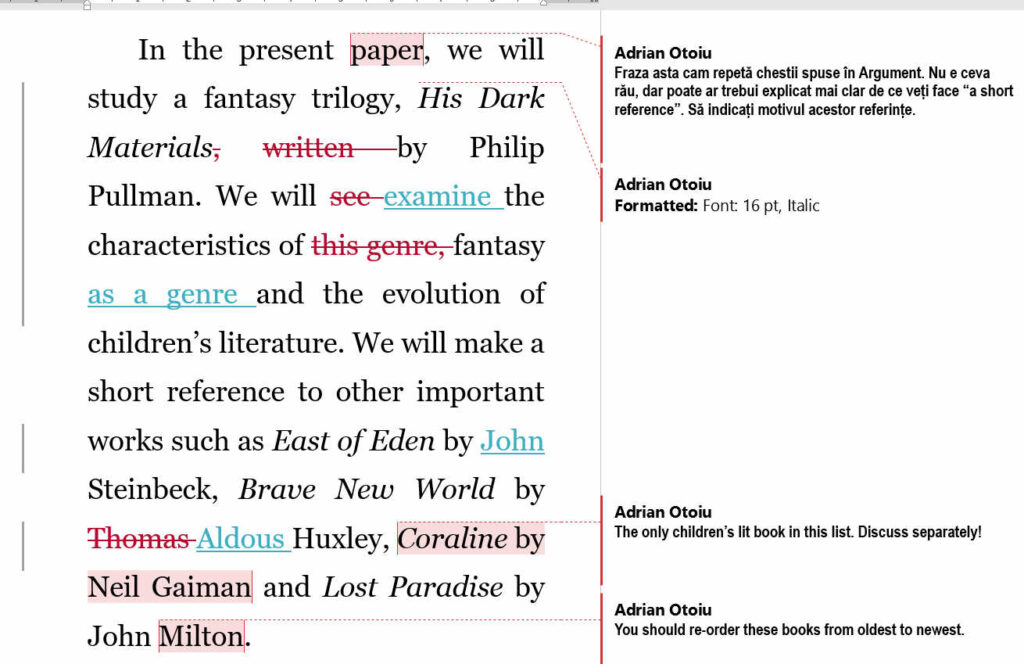
In our opinion, the best view of Track Changes is this:
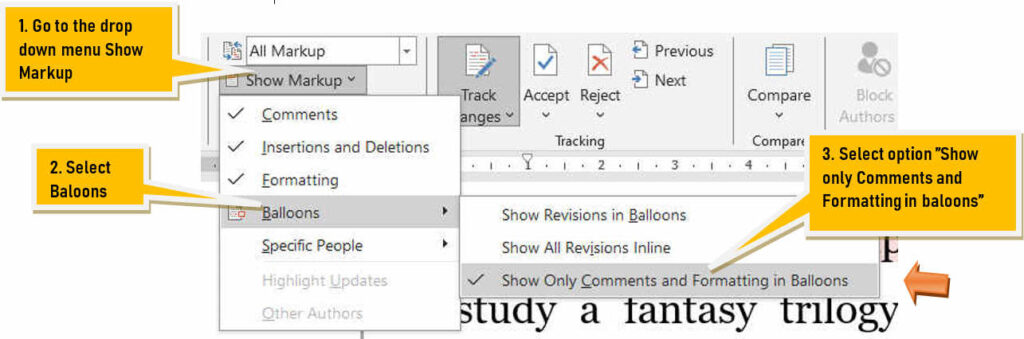
If your page looks differently, these are the settings to adjust. First the Balloons (which are the notes that appear on that right-hand side panel):
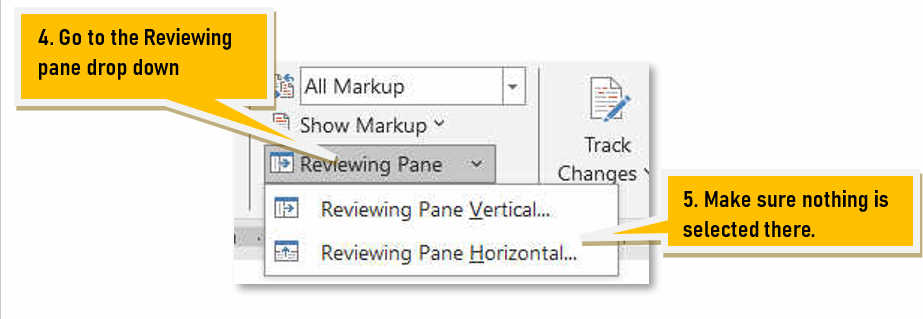
Also make sure the Reviewing pane is turned off:
If the colours are wrong, go to the next FAQ ↓.
Track Changes was initially designed for collaborative work, where several contributors work on the same document. You are not interested in multiple contributors, because you only want to see the feedback from your supervisor.
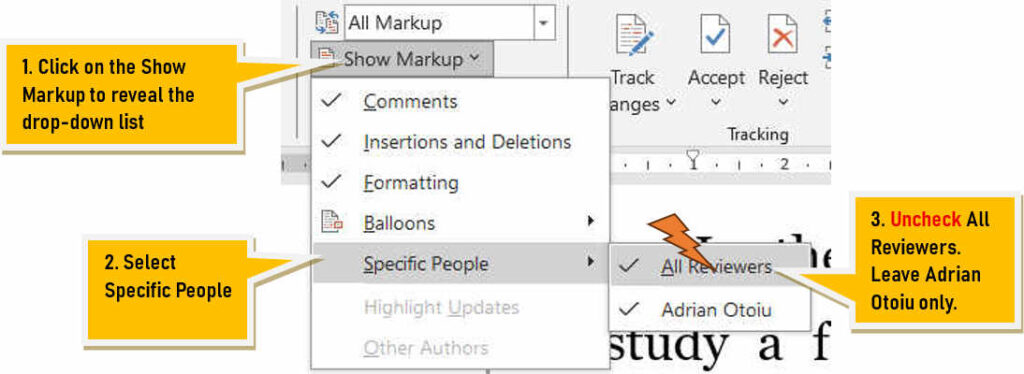
Then you should configure the markup options for Track Changes. Follow this order:
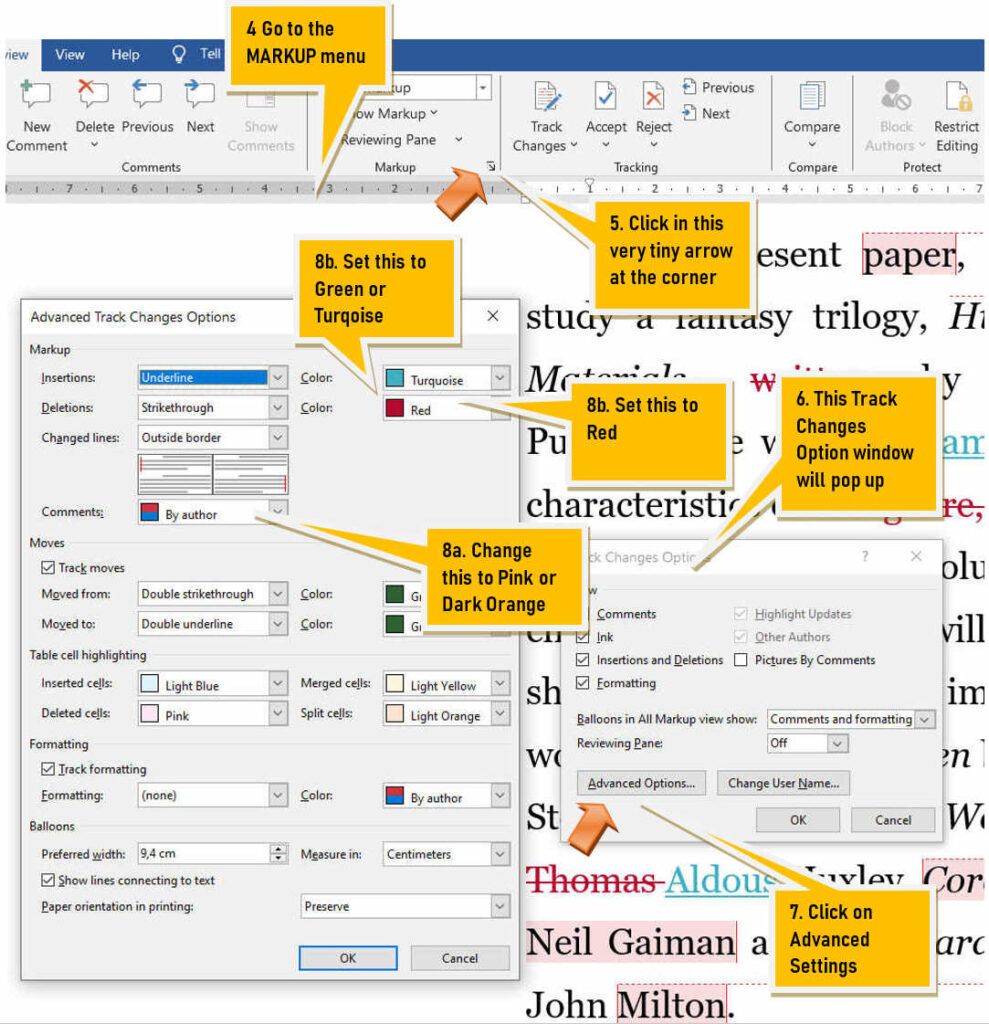
1_ First deal with the teacher’s comments. Read the comment and follow the advice. Add a precision, clarify an obscure spot, correct a reference, remove AI-tagged text, expand an argument… whatever.
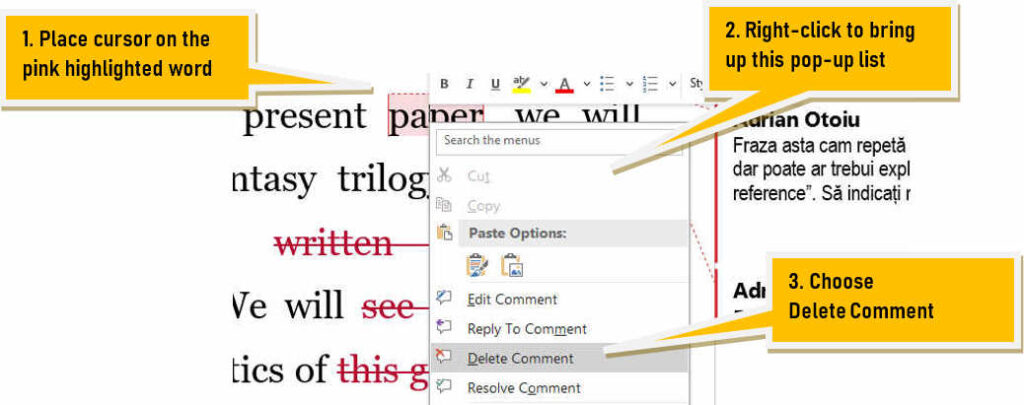
2_ Go through all the comments. After that go back to the beginning of the document and delete the resolved comments one by one. (I recommend you to do this before you begin Accepting or Rejecting Track Changes).
3_ Only after you have done that, go to Track Changes and start reviewing the text by clicking on Accept or Reject, as needed.
4_ When you finished all, you will get a message ”No more changes found.” At the same time, the right-hand panel where the comments and changes appeared should now be totally gone. If it did not disappear, it means you might have skipped something and have to hunt it throughout the document.
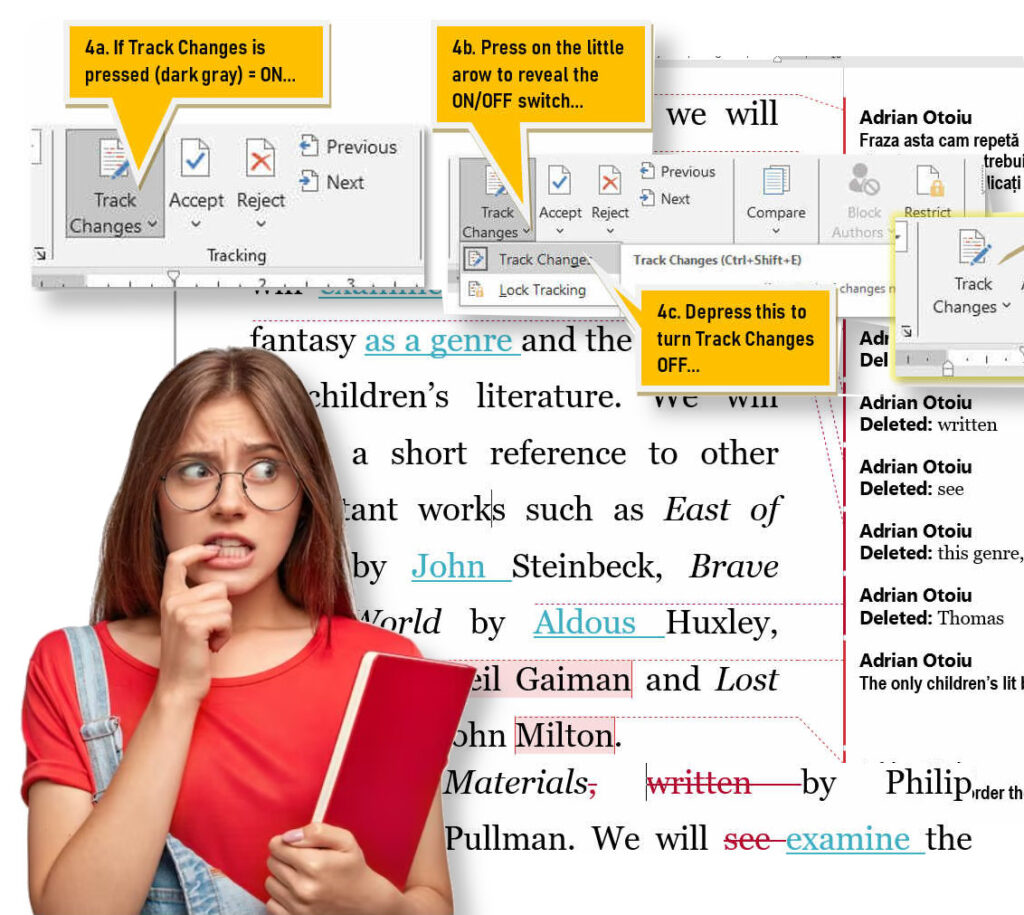
You have finished your work with Track Changes and your thesis looks clean and tidy?
Now it’s time to prepare for print. See what to do Before printing.